Sunday, July 25, 2010

3d Integration and How it was made

Original plate is a photo I took at Ruby Beach in Washington. 3d elements were created in 3d studio max, rendered with vray. composited in photoshop.


How it was made...
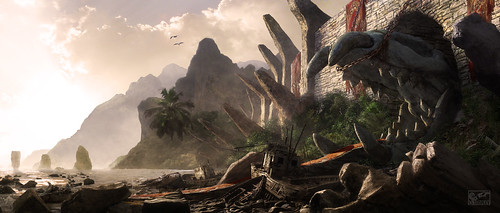
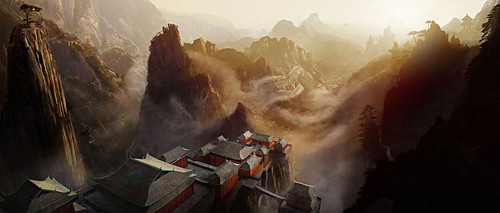
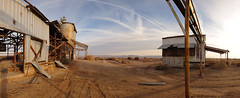
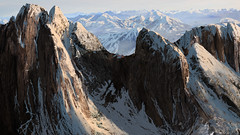
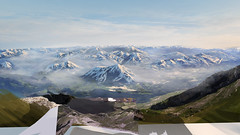
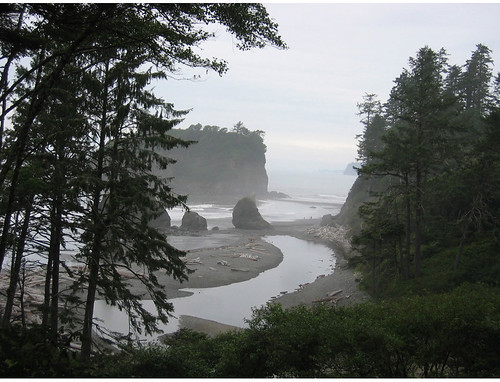
I started with a photo I took at Ruby Beach in Washington state
Week 3 Tut 1

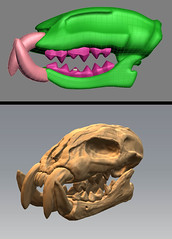
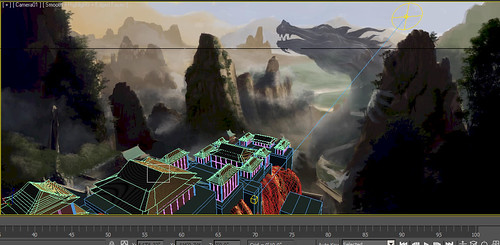
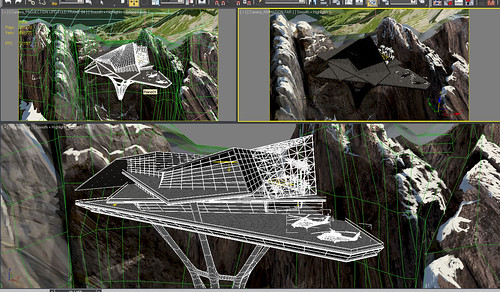
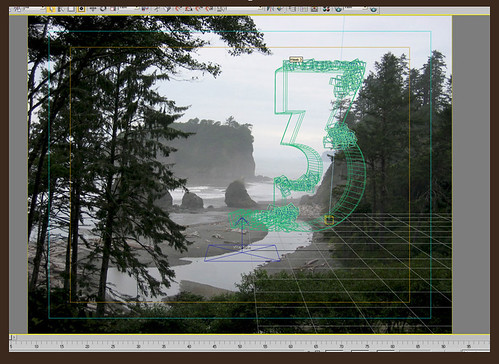
The background image was dropped into 3d Studio Max where the number 3 the "week" text and some 3d shrubbery were modeled.
Week 3 Tut 2


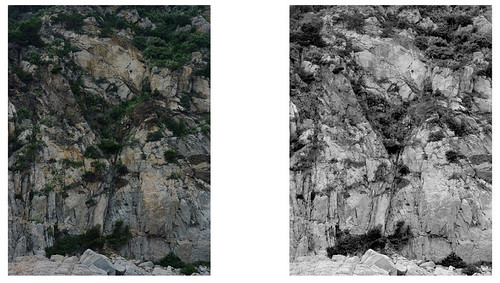
The textures for the 3d model came from photos of cliffs in Oregon (close enough to match the area where the original plate was photographed) The color image was used for my diffuse and a desaturated version was used for a quick displacement map.
Week 3 Tut 3


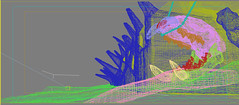
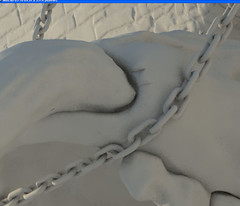
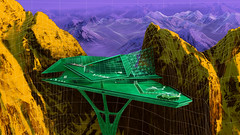
Since the rendered elements would be behind some haze, I used low settings.
The render included an alpha channel and a reflective plane.
Week 3 Tut 4

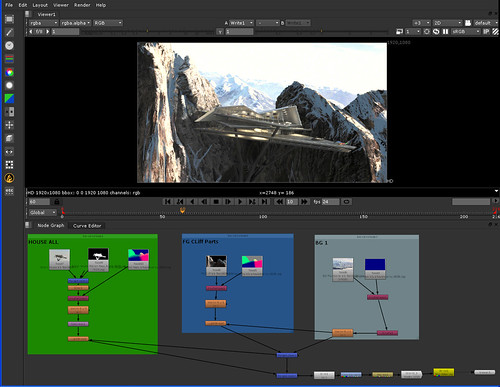
For the composite...
I dropped the render into place and used a few extraction methods to break out the overlapping tree limbs.
Next, I grabbed some trees from another photo of Ruby Beach and added them to the top of the "3"

The "week" part wasn't reading as well as I would have liked so i painted in some extra hightlights and evened out the surface texture to help it stand out a bit more.

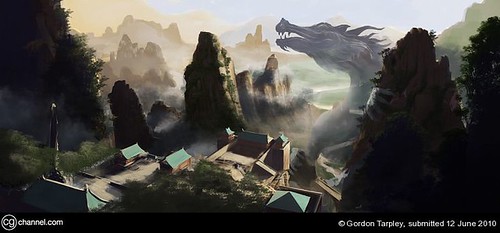
Grounding shadows were added and the render was color corrected to match the lighting and color of the background plate.

Using a color sample from the background sky, I panted in some extra haze around the rendered elements to help them sit more naturally in the scene.

For finishing, I used a 15% or 20% opacity softlight layer with a gradient, from very light blue at the top (to give the haze some subtle color) to an amber at the bottom (to help the greens toward the bottom pop a little more)


Week 3 Tut 5

This images was done quickly using a 2k wide base image with very low settings for my renders.
From start to finish this took just over 2 hours, including render times.
Hopefully some of this info was helpful!


Wednesday, July 21, 2010

Island Temple Matte Painting


Island Temple Matte Painting, originally uploaded by gordontarpley.
This is my entry and runner up for www.CGTantra.com May,2009 matte painting challenge titled The Ancient Temple

Created using 3d studio max, vray, mudbox and photoshop. Entry and runner up for www.cgtantra.com "Temple" matte painting challenge for May, 2009


skull model, started in 3d studio max (top) and detailed in mudbox (bottom)
I put more time into areas that would be visible in the final image so my apologies for not ironing out all the details towards the back and top. ;)
05-04-09 Progress
Test render of the skull model, modeled with 3ds max and mudbox, rendered with vray
Skull Test Render May CGChallenge

A wireframe view of the 3d modeled elements
Skull Set Model

closeup of ambient occlusion pass
SkullAOSample 05-10-09

I've been asked to write a tutorial on how I put this together. That tutorial is here...


This is an earlier concept for the same challenge. I figured if I were an ant a temple might be a place that fed many generations of my family, hence the discarded gumball machine. I still really like the idea but at the time the island temple really caught my interest which kept me more motivated. I'd like to do a "finished" version of this someday.

Temple For Ants Matte Painting Build-up on Vimeo by Gordon Tarpley

Monday, July 5, 2010

The 5 fugitives of the Shaolin Temple Matte Painting on Vimeo by Gordon Tarpley

My entry for cgchannel.com june matte painting challenge. not as much time this month so this was done really quickly.


Done for CGChannel.com June, 2010 Matte Painting Challenge


concept
Concept

3d model overlay

Shaolin Temple WIP screen grab

Friday, July 2, 2010

MadMax Pano Matte Painting


MadMax Pano Matte Painting, originally uploaded by gordontarpley.

This is the Pre-Effects version of this matte painting

this is the original plate supplied by Jonathan Berube
Mad Max Panoramic plate

and a screen grab of some of the 3d elements
MaxGrab1

the video clip is a work in progress that will be updated as soon as possible

CGChannel Matte Painting WIP from Gordon Tarpley on Vimeo.

Tony Stark's Mt. Pilatus mansion, CGChannel May matte painting FINAL

Winning Matte Painting for cgchannel.com matte painting challenge
see more of the process here
forums.cgchannel.com/showthread.php?t=11987


Tony Stark's Mt. Pilatus mansion, CGChannel May matte painting FINAL, originally uploaded by gordontarpley.

Camera Move UPdated WIP from Gordon Tarpley on Vimeo.

Original sketch for the architectural layout of the house.
House Plan V1

Since this image was to be based on an actual location I did a little research online and found a spot that would fit the description.
Site Reference


This matte painting was actually 2 separate matte paintings, one for the foreground cliff
FG Plate V1

and one for the background mountains.Which were based on a combination of a panoramic photo from Mt.Pilatus and google earth terrain data that I imported into sketchup then exported to 3ds max which is accurate to all the elevations of the background mountains. (but not recommended, the time to cleanup the geometry was substantial!)
BG Plate V1

and the house model
Stark House Max


color coded wireframe to show the 3 main elements...
Wire overlay

All of the elements, along with velocity, zdepth passes and some extra atmosphere, were composed in Nuke.
Nuke Grab


Other stuff that went along with this project...
a video made with debut while modeling one of the helicopters used in this scene...

Modeling the AW139 from Gordon Tarpley on Vimeo.


and an quick photoshop doodle based on the location for this piece

View From Mount Pilatus speed paint from Gordon Tarpley on Vimeo.