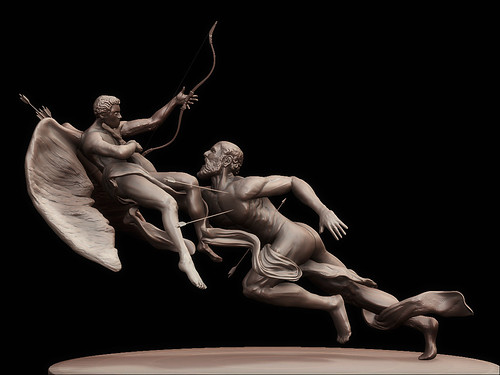
Scene was match moved, then entire background and contestant podiums were recreated in 3d studio max and rendered with vray. keying and roto done in after effects.
Monday, November 22, 2010
Digital Set Replacement
Scene was match moved, then entire background and contestant podiums were recreated in 3d studio max and rendered with vray. keying and roto done in after effects.
Sunday, November 21, 2010
Renders in Use!!!
This is the actual image. This was done about 4 years ago but was one of my better images at the time.
Everything was modeled in 3d Studio Max with the exception of the shower unit, which was supplied by tthe client and made in Pro Engineer, sent to us and merged into 3d studio max using Npower translator.
I was most proud of the "Rain Glass". The client sent us a physical sample to use for reference and it took lots of experimenting to get my material to match perfectly. Unfortunately it appears they didn't use the detail shot on their packaging. Bummer!
There were actually a few more packages with my images on them. I'll update this post with them when I find my original versions.
Tuesday, November 2, 2010
Sunday, October 24, 2010
Saturday, October 23, 2010
Zbrush Picture Frame
This was something done really quickly for work. The frames would be all the way across a room from the camera so i didn't go all out with the detail, just enough to give an impression of carved frames. The actual final frames used in the scene had a few more details added as a bump map in 3ds max but were so far from the camera and eventually tiny in the render that this ended up working nicely.
Thursday, September 23, 2010
Haunted Chateau Matte Painting
another older work done almost 2 years ago. this one is all photo manipulation and some light hand painting to create some details such as holes in the roof with rafters showing and reflections on windows and a few hand painted reflections as highlights here and there...
Quick build-up of my Haunted Chateau matte painting done for www.CGTantra.com April, 2009 Matte Painting Challenge.
CGChannel April 2010 Matte Painting
Another one being posted out-of-order. someday i'll be all caught up and my posts will become chronological... maybe i can change the date on this or something..
This is my (winning!) entry for CGChannel.com April 2010 matte painting challenge themed "Alice in wonderland"
my work-in-progress forum is here
CGChannel April 2010 Matte Painting, originally uploaded by gordontarpley.
here's the vid of the entire process squished down into about 20 minutes
i didn't add a soundtrack so if you feel like watching the whole thing i'd recommend logging onto pandora.com or something similar and get some tunes playing!
..
CGChannel September Matte Painting Challenge
Based on the time constraints, I'm probably getting in a little over my head with this one. I've got some plans to work out still with a few elements which right now seem like the method of execution may be slightly convoluted. I'll see if I can work out something better and try to explain it all when I'm finished.
This vid is still a work in progress but I'm putting it at the top of this post because as I progress with this I'll be replacing this video with whatever the most up-to-date version is...
better to watch full screen btw.

Barad Dur WIP V1, originally uploaded by gordontarpley.
This month's cgchannel.com challenge is lord of the rings themed. this is my early verion. still quite a long way to go. this challenge will include an animated camera or two that i'll post up here by early next month. more updates to come!This vid is still a work in progress but I'm putting it at the top of this post because as I progress with this I'll be replacing this video with whatever the most up-to-date version is...
better to watch full screen btw.
Barad Dur WIP V1, originally uploaded by gordontarpley.
really quick, VERY low res test render to see what i'll need to cover with my matte painting.
big chunk of mountains missing and some problems with projection on a few object right now but i have those parts broken out for individual projection for the final....
should have better update soon!
Mostly modeled in 3ds max but i've been using zbrush for rocks and some of the smaller details. still going with this but most likely won't need to model too much higher than what's seen here. only the base will be visible in the matte painting... more soon!
Saturday, August 21, 2010
Port Matte Painting
Submitted Final

took on a little too much this month and didn't have the time to give this the TLC it deserved but overall, not the worst thing I've made so I'll go ahead and post it!
CGChannel.com Matte Painting Concept/Work-in-Progress,
here's a quick concept made by doing a paintover of a photo i found online. another challenge concept for cgchannel.com matte painting challenge.
Got some weirdness from the debut screen recorder. of the many many videos i've made with this program this is the first time i've had an issue. fortunately it messes up an area that is pretty boring anyway so most of the work was still captured
I'll update this post as i progress with this image
took on a little too much this month and didn't have the time to give this the TLC it deserved but overall, not the worst thing I've made so I'll go ahead and post it!
CGChannel.com Matte Painting Concept/Work-in-Progress,
here's a quick concept made by doing a paintover of a photo i found online. another challenge concept for cgchannel.com matte painting challenge.
Got some weirdness from the debut screen recorder. of the many many videos i've made with this program this is the first time i've had an issue. fortunately it messes up an area that is pretty boring anyway so most of the work was still captured
I'll update this post as i progress with this image
Struggle-No Time for Love
Final (and winning!) submission for the cgchannel.com digital sculpting challenge for August 2010

Low res test. i'll be rendering more frames for this over the weekend but i need to processors for work right now. probably updated sunday night..
done for cgchannel.com august, 2010 digital sculpting challenge titled "struggle"
work in progress thread here...
http://forums.cgchannel.com/showthread.php?t=12392

done for cgchannel.com august, 2010 digital sculpting challenge titled "struggle"
there's still quite a few things to fix here and the wings will be completely redone at my earliest opportunity. vid will be updated in a few weeks most likely
this is the start of the upgrade to the wings for the character in my last post. i should have a second part to this vid tomorrow, or i'll add it onto the end of this and reupload... or something.. we'll see. ;)
CGChannel.com digital sculpting Work-in-Progress, I'll update this post as i progress with this image

Low res test. i'll be rendering more frames for this over the weekend but i need to processors for work right now. probably updated sunday night..
done for cgchannel.com august, 2010 digital sculpting challenge titled "struggle"
work in progress thread here...
http://forums.cgchannel.com/showthread.php?t=12392
done for cgchannel.com august, 2010 digital sculpting challenge titled "struggle"
there's still quite a few things to fix here and the wings will be completely redone at my earliest opportunity. vid will be updated in a few weeks most likely
this is the start of the upgrade to the wings for the character in my last post. i should have a second part to this vid tomorrow, or i'll add it onto the end of this and reupload... or something.. we'll see. ;)
CGChannel.com digital sculpting Work-in-Progress, I'll update this post as i progress with this image
Sunday, July 25, 2010
3d Integration and How it was made
Original plate is a photo I took at Ruby Beach in Washington. 3d elements were created in 3d studio max, rendered with vray. composited in photoshop.
How it was made...
I started with a photo I took at Ruby Beach in Washington state

The background image was dropped into 3d Studio Max where the number 3 the "week" text and some 3d shrubbery were modeled.

The textures for the 3d model came from photos of cliffs in Oregon (close enough to match the area where the original plate was photographed) The color image was used for my diffuse and a desaturated version was used for a quick displacement map.

Since the rendered elements would be behind some haze, I used low settings.
The render included an alpha channel and a reflective plane.

For the composite...
I dropped the render into place and used a few extraction methods to break out the overlapping tree limbs.
Next, I grabbed some trees from another photo of Ruby Beach and added them to the top of the "3"
The "week" part wasn't reading as well as I would have liked so i painted in some extra hightlights and evened out the surface texture to help it stand out a bit more.
Grounding shadows were added and the render was color corrected to match the lighting and color of the background plate.
Using a color sample from the background sky, I panted in some extra haze around the rendered elements to help them sit more naturally in the scene.
For finishing, I used a 15% or 20% opacity softlight layer with a gradient, from very light blue at the top (to give the haze some subtle color) to an amber at the bottom (to help the greens toward the bottom pop a little more)

This images was done quickly using a 2k wide base image with very low settings for my renders.
From start to finish this took just over 2 hours, including render times.
Hopefully some of this info was helpful!
How it was made...
I started with a photo I took at Ruby Beach in Washington state
The background image was dropped into 3d Studio Max where the number 3 the "week" text and some 3d shrubbery were modeled.
The textures for the 3d model came from photos of cliffs in Oregon (close enough to match the area where the original plate was photographed) The color image was used for my diffuse and a desaturated version was used for a quick displacement map.
Since the rendered elements would be behind some haze, I used low settings.
The render included an alpha channel and a reflective plane.
For the composite...
I dropped the render into place and used a few extraction methods to break out the overlapping tree limbs.
Next, I grabbed some trees from another photo of Ruby Beach and added them to the top of the "3"
The "week" part wasn't reading as well as I would have liked so i painted in some extra hightlights and evened out the surface texture to help it stand out a bit more.
Grounding shadows were added and the render was color corrected to match the lighting and color of the background plate.
Using a color sample from the background sky, I panted in some extra haze around the rendered elements to help them sit more naturally in the scene.
For finishing, I used a 15% or 20% opacity softlight layer with a gradient, from very light blue at the top (to give the haze some subtle color) to an amber at the bottom (to help the greens toward the bottom pop a little more)
This images was done quickly using a 2k wide base image with very low settings for my renders.
From start to finish this took just over 2 hours, including render times.
Hopefully some of this info was helpful!
Wednesday, July 21, 2010
Island Temple Matte Painting
Island Temple Matte Painting, originally uploaded by gordontarpley.
This is my entry and runner up for www.CGTantra.com May,2009 matte painting challenge titled The Ancient Temple
Created using 3d studio max, vray, mudbox and photoshop. Entry and runner up for www.cgtantra.com "Temple" matte painting challenge for May, 2009
skull model, started in 3d studio max (top) and detailed in mudbox (bottom)
I put more time into areas that would be visible in the final image so my apologies for not ironing out all the details towards the back and top. ;)
Test render of the skull model, modeled with 3ds max and mudbox, rendered with vray
A wireframe view of the 3d modeled elements
closeup of ambient occlusion pass
I've been asked to write a tutorial on how I put this together. That tutorial is here...
This is an earlier concept for the same challenge. I figured if I were an ant a temple might be a place that fed many generations of my family, hence the discarded gumball machine. I still really like the idea but at the time the island temple really caught my interest which kept me more motivated. I'd like to do a "finished" version of this someday.
Monday, July 5, 2010
The 5 fugitives of the Shaolin Temple Matte Painting on Vimeo by Gordon Tarpley
The 5 fugitives of the Shoalin Temple Matte Painting on Vimeo by Gordon Tarpley, originally uploaded by gordontarpley.
Done for CGChannel.com June, 2010 Matte Painting Challenge
concept
3d model overlay
Friday, July 2, 2010
MadMax Pano Matte Painting
Tony Stark's Mt. Pilatus mansion, CGChannel May matte painting FINAL
Winning Matte Painting for cgchannel.com matte painting challenge
see more of the process here
forums.cgchannel.com/showthread.php?t=11987

Tony Stark's Mt. Pilatus mansion, CGChannel May matte painting FINAL, originally uploaded by gordontarpley.
see more of the process here
forums.cgchannel.com/showthread.php?t=11987
Tony Stark's Mt. Pilatus mansion, CGChannel May matte painting FINAL, originally uploaded by gordontarpley.
Camera Move UPdated WIP from Gordon Tarpley on Vimeo.
Original sketch for the architectural layout of the house.
Since this image was to be based on an actual location I did a little research online and found a spot that would fit the description.
This matte painting was actually 2 separate matte paintings, one for the foreground cliff
and one for the background mountains.Which were based on a combination of a panoramic photo from Mt.Pilatus and google earth terrain data that I imported into sketchup then exported to 3ds max which is accurate to all the elevations of the background mountains. (but not recommended, the time to cleanup the geometry was substantial!)
and the house model
color coded wireframe to show the 3 main elements...
All of the elements, along with velocity, zdepth passes and some extra atmosphere, were composed in Nuke.
Other stuff that went along with this project...
a video made with debut while modeling one of the helicopters used in this scene...
Modeling the AW139 from Gordon Tarpley on Vimeo.
and an quick photoshop doodle based on the location for this piece
View From Mount Pilatus speed paint from Gordon Tarpley on Vimeo.
Wednesday, June 30, 2010
Recycle Wagon
my very quickly done entry for the www.cgsociety.org "accelerate", syd mead inspired challenge.
entry post is here
http://forums.cgsociety.org/showthread.php?f=309&t=896965
this was done with a base model in 3d studio max then painted over almost completely by hand using a wacom and photoshop.
entry post is here
http://forums.cgsociety.org/showthread.php?f=309&t=896965
this was done with a base model in 3d studio max then painted over almost completely by hand using a wacom and photoshop.
Subscribe to:
Posts (Atom)